So, you’re wanting to find out how to make a taser out of household items? Perhaps you’re trying to figure out how to shock somebody with the things you have readily available?
Well! You’ve come to the best place. Sometimes we don’t really want to have to go out and buy more things or wait for intricate electronic pieces to get shipped to us. We just want to have a nice day at home with a fun project to work on. I get it! That’s why I’m going to help you step by step to get a device up and running that lets you feed your desire of playing with some electricity!
Remember! Working with electricity is dangerous! I do not take any liability for any accidents or injuries that may occur from you using or creating this device. So please, be careful!
Also, this is not a viable substitute for a personal self-defense weapon. It takes about 15 seconds to charge up and does not carry enough power to dissuade an attacker. Do not use this in place of a personal self-defense weapon. This is just for fun!
- PROFESSIONAL SELF DEFENSE EQUIPMENT: Powerful heavy duty stun gun flashlight combination. Delivers painful stoppping power and backed by a Lifetime...
- SNATCH PREVENTION TECHNOLOGY: Shock plates on the side of the stun gun will shock an attacker if they attempt to take the gun from you; Contoured grip...
- INTERNAL RECHARGEABLE BATTERY: Our stun gun simply plugs into a standard wall outlet for a complete recharge. No Batteries needed! Charging cord...
Materials You Need
- 4 AA or larger Batteries – You can use any battery but a AAA won’t really be strong enough. I would advise using AA or larger for this project. You can use just 3 or 2 which will just make a smaller device as you’ll see when we are creating it
- Aluminum Foil – This is essentially your casing for the device which will hold the components together
- Electrical Tape – Electrical tape is the best tape to use when working with electricity. It is non-conducive which means you won’t accidentally shock yourself. Duct tape works well too, as an alternative.
- Wire – You’ll need some kind of metal wire. Anything will do. You can pull apart old electronics or even use a paperclip
What we are going to make here is a sort of stun gun “wand” as opposed to a true taser. A taser would involve a specific type of device that shoots a projectile out and also has a capacitor of some kind to issue a repeating charge so that the projectiles are still electrified when they hit the target. Now, this is possible to make at home but you won’t find a capacitor in household items which is what we are focusing on today. This is why we’re making the Stun Gun Wand instead!
Step By Step Instructions
Step 1) Cut your Foil
You want to cut a sizable piece of foil from the roll. If you don’t have something to cut it with, that’s ok! It doesn’t need to be perfect. We are essentially going to be wrapping the foil over the batteries and the batteries will be positioned in a straight line to create a stun gun “wand.” So simply tear a piece of foil off that is going to be enough to cover all your batteries.
Step 2) Line up your Batteries
In this step, place the foil on the surface you are working on and just make sure the foil is flat. Then you will place the first battery on the end of the foil so that the negative end of the first battery hangs off the edge of the foil just a little bit, just a couple of centimeters. The battery will have a – on the end to indicate negative and a + to indicate positive. After the first battery is placed, then place the rest of the batteries with the negative end touching the positive end of each battery, respectively.
End of foil ↓
← Foil Continues ← +Battery– +Battery– +Battery– +Battery–
Step 3) Wrap the Batteries
Now that the batteries are lined up you want to wrap them up in the foil. It’s easiest to have them on one of the long sides of the foil so you can just roll up the batteries in the foil. You should now have the batteries wrapped up in the foil like a burrito.
Step 4) Apply Electrical Tape
Now you just want to apply your electrical tape to the end that has the negative bottom of the battery sticking out. Do not tape the exposed battery. You will tape the foil itself simply so it stays rolled up and doesn’t come undone. It would be best to wrap the whole thing just because the foil can get hot from this design and it will make it safer.
A key thing here is to not wrap the other side either. So, leave the exposed battery end untaped but also leave the opposite end untaped otherwise the device will not work.
Step 5) Attach the Wire
Now, take your piece of wire, it should be about 3 times the length of your device, and wrap it around the exposed end of the wand that is covered in foil. You simply just need to wrap it so it is tight and touching the foil. The more surface area of the wire that touches the foil, the better it will work.
Once the wire is attached to the bottom you will run the two ends up along the side of the tape to the exposed battery on the opposite end of the wand.
Then apply another piece of electrical tape to secure the wire to the wand on the foil end and now that the wire is attached you also want to apply electrical tape to actually cover the end of the wand. The opposite end with the negative battery should still be exposed and untouched.
You should have two loose ends of the wire hanging around now. You can cut one of those loose ends to clean up the design and I would cut the shorter one. Then, finish taping the wire up the length of the shaft of the wand so you just have the end of the wire sticking out of the tape towards and past the exposed negative end of the battery.
Step 6) Manipulate the Wire into the Proper Position
Now, with the length of the wire, fold it over so that the fold will place itself just over the end of the exposed battery. The reason you are folding it, as opposed to just touching the end of the wire to the battery, is simply to give the piece of wire more mass so it doesn’t melt off the end. The wire can get very hot with this design.
With the fold positioned about two centimeters away from the end of the battery. You can use a final piece of electrical tape to hold it in place. Essentially, you want to be able to push this end into the object you want to shock and by touching it to the thing you are shocking it will force the wire to touch the end of the battery which will cause the electrical reaction.
Step 7) You’re done!
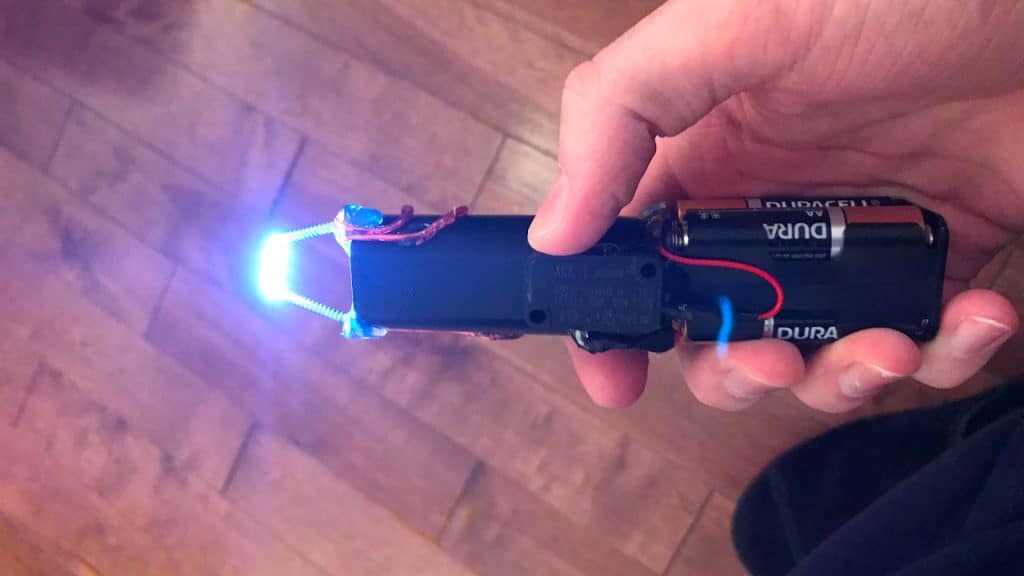
Now that the device is finished, you can use it! On the first use it can take about a minute or perhaps two to warm up and cause the reaction but after the first time it usually only takes about 10 or 15 seconds.
To use it, just touch the end with the exposed battery and wire hovering above the battery to whatever it is that you want to shock and the mass of the object will force the wire to touch the battery and BOOM! You have electricity! Awesome!
Frequently Asked Questions
How safe is this?
Well, when working with electricity, which is volatile by nature, there is always danger involved. However, a battery is considered quite stable rendering the possibilities of an adverse situation to be rather low.
It is worthy to note that when something goes wrong in electrical creations it is generally in the form of an explosion. So while the chances are low, the results are always cataclysmic if something were to happen. If you follow these steps you will be following a guide that is aimed at keeping you as safe as possible.
That being said, I cannot and do not take any liability for any injury or accident that may occur.
How powerful is the Stun Gun Wand?
While the AA battery itself holds between 1-3 amps. If you are shocked by the full effect of this, it can actually be lethal. However, the battery only has about 2-4 volts of power. The volts is the penetrating power of the charge and the human skin has natural resistance so that the full power of the shock is impossible to penetrate a person.
This means that you may feel a burning sensation or something similar to a static shock. It takes about 25,000 volts to pass through human skin and clothing as well.
Conclusion!
I sincerely hope you enjoyed my step by step guide on how to make a taser out of household items! You can show this off to your friends and it’s also a great first step into working with electrical components! As you progress in the exciting world of conducive electronic weapons you will find there is so, so much more you can do!
I would highly advise making sure to use the electrical tape specifically, if possible. It just makes sense if you’re going to be working with electricity! This will ensure you stay as safe as possible while simultaneously having as much fun as possible. Stay safe and happy crafting!
If you liked this guide you’ll like this one on making a stun gun from a pen.

- Optimized self-defense range: 15-foot Shooting distance, ideal for most defensive situations
- Powerful protection ensures a safe escape: 30-second muscular override gives you time to get away, and we'll replace your TASER device free of charge
- Effective up close: contact stun capabilities help at close range or in the event of a missed shot